

Tips & Tutorials
Why Your Tapered Tumbler Engraving Fades on One Side (And How to Fix It)
Nov
You line up a design on a tapered tumbler, run the job, and one side comes out worse than the other. One end looks sharp and clean, the other comes out faded, shallow, or uneven. So you start second-guessing yourself — bump the power, slow the speed, re-check the file, run it again.
Before you change a single setting, stop. On a tapered tumbler, the problem is almost always the angle of the tumbler, not the laser.
Tapered tumblers are everywhere right now because they make great personalized gifts, so this comes up constantly — and it trips up plenty of experienced engravers too. The good news is that the fix is mechanical and repeatable. Once you understand what is actually happening, you can set it up in about a minute.
Why a Tapered Tumbler Throws Off Your Focus
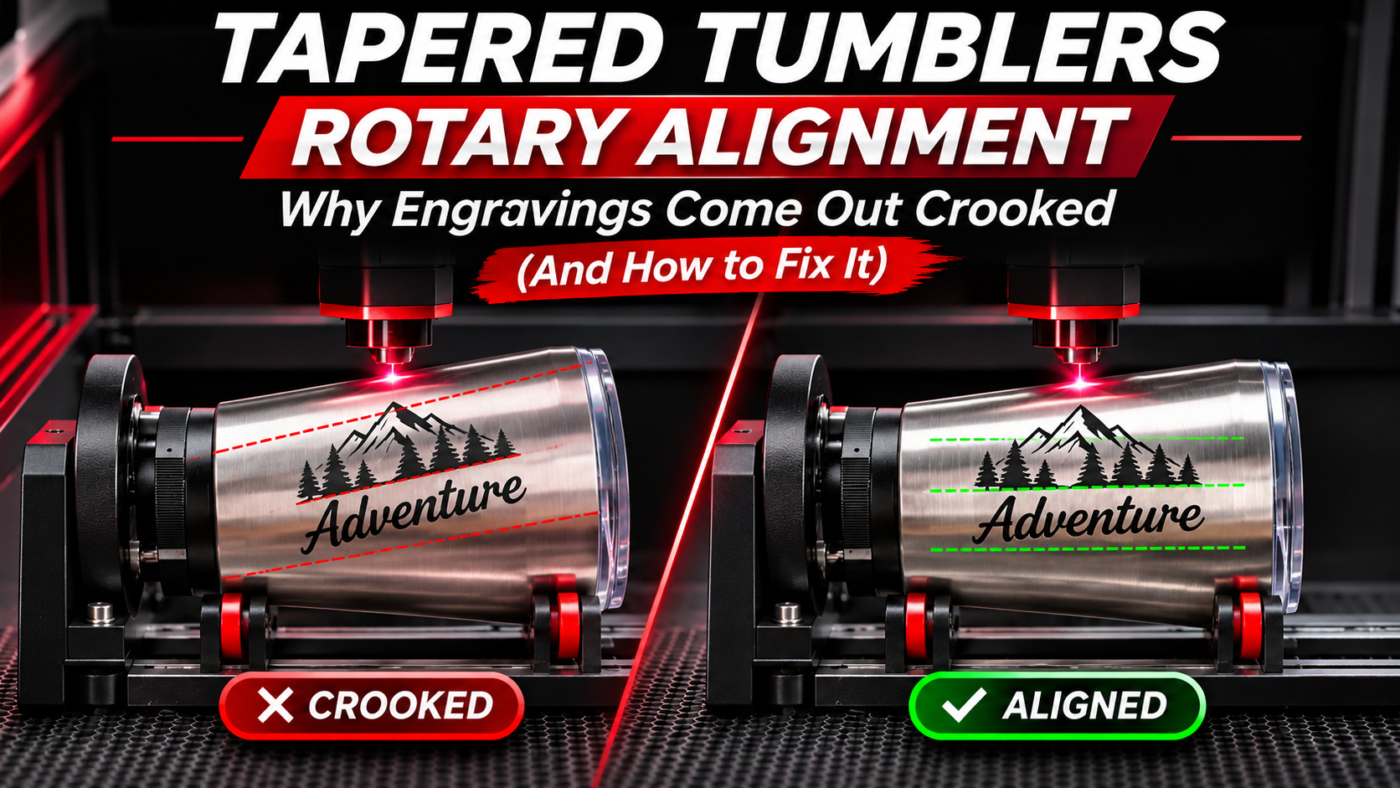
A tapered tumbler is wider at one end than the other. Mount it in a chuck rotary and let it sit the way it naturally wants to, and the surface you are engraving — the top of the tumbler — sits at a slope. It looks level to the eye, but it isn’t.
That slope is the whole problem. Your laser is focused for one specific distance between the lens and the surface, and it only engraves cleanly inside a narrow band around that focus point. As the beam travels along a sloped surface, the distance to the lens keeps changing, and part of your design drifts out of that band. That drift is the faded, soft, or uneven look you are fighting. Even a small taper adds up over the length of a design, which is why longer graphics show it the most.
The fix is simple: raise the smaller-diameter end until the engraving surface is parallel to the laser’s focal plane. Get the surface flat relative to the laser, and the focus stays consistent from one end of the design to the other.
How to Align a Tapered Tumbler in 5 Steps
1. Mount the tumbler. Secure the tumbler in the chuck rotary. Close the jaws evenly so it is held firmly and spins without slipping — but not so hard that you crush a thin wall or mar the coating.
2. Tilt up the small end. Raise the smaller-diameter end until the top engraving surface is parallel to the laser’s focal plane. If your rotary has a built-in tilt adjustment, use it. If it doesn’t, raise that end another way, such as shimming under it. Go a little at a time and check as you go. On a compatible D80 chuck rotary, the TL Tool-Free Chuck Rotary Jaw & Tilt Adjustment Kit lets you make these small tilt changes with finger knobs instead of tools.
3. Set your focus. Once the surface is parallel to the focal plane, focus on the exact area you are going to engrave. Tilt first, focus second — always in that order. Focusing before you tilt just means re-focusing afterward.
4. Verify both ends. Check your focus at both ends of the engraving area. The distance from the lens to the surface should be about the same at each end. If it isn’t, the tumbler is still sloped — nudge the tilt and focus again.
5. Engrave. When both ends match, run your job with the rotary enabled.
A Quick Way to Check the Angle
If you are not sure whether the surface is truly parallel, check your focus at both ends of where the design will sit and compare. Use whatever method you normally trust — a focus gauge, a focus block, or your machine’s autofocus. Matching readings at both ends mean the surface is flat to the laser. A gap between them means you still have a slope to correct. It takes about thirty seconds, and it saves you from finding out on a finished blank.
The Most Common Mistake
Most people try to get the tumbler’s center axis perfectly level.
That’s not the goal.
On a taper, a level center axis guarantees a sloped engraving surface — the exact thing you are trying to avoid. What matters is the surface you are engraving, not the centerline. Keep that surface parallel to the focal plane and the tumbler will look slightly tilted in the rotary. That tilt is correct.
One more thing worth separating out: if your text comes out slanted or the design looks stretched, that is a different issue from fading. Slanting and stretching usually point to a rotary that is out of square or a diameter setting that is off, not the tumbler’s tilt. Fix the focus-angle problem first, then look at squareness and diameter if the shape still looks wrong.
Better Angle, Better Engraving
This same approach works for most tapered tumblers, travel mugs, and bottles. The next time one end of a design looks off, check the angle before you reach for the power and speed settings. A minute spent tilting the tumbler fixes what an hour of setting changes usually won’t — and once you have done it a few times, it becomes second nature.
